How to Create a Meta Ads Campaign from Scratch: A Beginner-Friendly Guide (2025)
- Start Generating Leads
- Feb 16
- 15 min read
Updated: Feb 19
Meta Ads, formerly known as Facebook Ads, are a powerful tool for businesses of all sizes to reach their target audience on Facebook and Instagram. This step-by-step guide will walk you through creating a Meta Ads campaign from the ground up, even if you're a complete beginner. We'll cover everything from setting up your foundational tools to launching and optimizing your first ad campaign.
If you've already completed some of these steps, use the links below to jump to a specific section.
What You'll Need Before You Start:
Before diving into creating your Meta Ads campaign, make sure you have the following ready:
A Facebook Business Page: If you don't have one yet, you'll need to create a Facebook Page for your business. It's quick and easy!
An Instagram Business Account (Optional but Recommended): If you want to advertise on Instagram, set up an Instagram Business account and link it to your Facebook Page.
A Website URL (If Applicable): If your goal is to drive traffic to your website or track website conversions, have your website address ready.
Business Information: Know your business name and have a professional business email address handy.
A Budget in Mind: Decide on a starting budget for your ads. You can begin with a small daily budget and adjust as you go.
1. Setting Up Your Meta Business Manager: Your Central Advertising Hub
Think of Meta Business Manager as your central command center for all your Meta advertising activities. It allows you to manage your Facebook Pages, Instagram accounts, ad accounts, and team members in one place. It keeps everything organized and separate from your personal Facebook profile.
Steps to Create a Business Manager:
Go to the Meta Business Manager website: Visit business.facebook.com and make sure you are logged into your personal Facebook account.

Screenshot of the Business Manager homepage with the "Create Account" button highlighted Click "Create Account"

Screenshot of the Business Manager account creation form Enter your Business Details:
Business Name: Use your official business name.
Your Name: Enter your own name.
Business Email Address: Use a professional email address associated with your business.
Follow the Prompts: Meta will guide you through a few more steps to finalize your Business Manager setup.
Why is Business Manager Important?
Organization: Keeps your business assets separate from your personal Facebook profile.
Collaboration: Allows you to grant different levels of access to team members and agencies, controlling who can manage your ads.
Scalability: Essential for growing businesses managing multiple ad accounts and Pages.
Troubleshooting Tip: If you can't create a Business Manager, ensure you are using a real business name and a professional email address.
Common Mistake: Don't use your personal Facebook profile for business ads always use Business Manager to keep things separate and professional.
2. Creating Your Meta Pixel: Essential Tracking for Ad Success
The Meta Pixel is a small snippet of code that you place on your website. Think of it like a tracking device for your website. It tells Meta what actions people take after clicking your ads, so you can see what's working. This data is invaluable for measuring campaign performance and optimizing for better results.
Steps to Create and Install Your Meta Pixel:
Go to Events Manager: In your Business Manager, click the menu icon (usually nine dots) and find "Events Manager."

Screenshot of Business Manager menu with "Events Manager" highlighted Connect Data Sources: Click "Connect Data Sources" and select "Web."

Screenshot showing "Connect Data" in Meta ads manager 
Screenshot of Events Manager options with "Web" selected Create and name your new dataset. This houses your Meta Pixel and any other data that you decide to link later. You can just name this as per your website or business name.

Screenshot of how to create a new dataset in Meta Choose Setup Method:

Screenshot of the three setup methods for Meta Datasets Set up with Conversions API Gateway: This includes additional ongoing costs and support from one of the Meta Business Partners.
Recommended - Set up with partner integration: We recommend this approach because most popular website hosts offer easy and fast integration with the Meta Pixel and Conversions API. Clicking this option will prompt you to enter your website URL or select your platform (e.g., Shopify, WordPress, Wix) and guide you through the integration process.
Set up manually: Choose this if you're comfortable editing your website's code or if you have a web developer. Meta will provide the base code to copy and paste into the <head> section of every page of your website.
Verify Pixel Installation: Once you have linked your Meta Pixel and Conversions API data to the Meta Events Manager platform, navigate to 'Data Sources', then Test Events to confirm that your website is firing both a Page View and your Lead form fills. Meta will track the events firing and should report back this data once you do a test form fill. You can also download the free "Meta Pixel Helper" Chrome Extension to ensure your pixel is firing correctly on your website.

Screenshot of "Test Events" in Meta Events Manager
Benefits of Using the Meta Pixel and Conversions API:
Conversion Tracking: See which ads are driving valuable actions on your website, like purchases, form submissions, or page views.
Retargeting: Reach people who have previously interacted with your website with targeted ads.
Optimization: Meta's algorithm uses pixel data to optimize your ad delivery to show your ads to people most likely to take your desired actions.
Audience Building: Create "Lookalike Audiences" of people who share characteristics with your website visitors.
Troubleshooting Tip: If your pixel isn't working, double-check that you've installed the pixel correctly on the website and is firing at all. If not you may need to re-install the pixel using the above methods. If you installed the code manually ensure it was placed in the <head> tag of the website and use Meta Pixel Helper (chrome extension) to help diagnose the issues.
Common Mistake: Forgetting to install the pixel on all pages of your website if you want to track actions across your entire site.
3. Creating and Linking Your Facebook and Instagram Pages to Business Manager
To run ads for your Facebook Page and Instagram account, you need to link them to your Business Manager. This centralizes management and ensures proper permissions for advertising on both platforms.
Steps to Link Your Facebook Page:
Go to Business Settings: In your Business Manager, click the menu icon (nine dots) and select "Business Settings."

Screenshot of "Business Settings" button click Navigate to Pages: In the left-hand menu, under "Accounts," click on "Pages."

Screenshot of Business Settings left menu with "Pages" highlighted Click "Add": You'll see a blue "Add" button. Click it and choose "Add an Exsiting Facebook Page" or "Create a new Facebook Page" from the dropdown menu depending on if you've already created a Facebook page or you need to create one.

Screenshot of "Pages" section with "Add" button and dropdown menu showing "Add an Exsiting Facebook Page" or "Create a new Facebook Page" If you need to create a Facebook Page, follow the steps in building your page and once complete it will automatically link to your Business Portfolio.

Screenshot of "Create a Facebook page" pop-up window If you have already created a Facebook page, then Search or Paste Page URL: In the pop-up window, you can either:

Screenshot of "Add a Facebook Page" pop-up window with search bar Search for your Facebook Page: Type the name of your Facebook Page in the search box. If your Page exists, it should appear in the results.
Paste your Facebook Page URL: If you have the URL of your Facebook Page, you can paste it directly into the box.
Select Your Page and Add Page: Choose your Facebook Page from the search results or after pasting the URL. Click the "Add Page" button.
Important: If you are not an admin of the Facebook Page, you may need to request access. If you are an admin, the Page should be linked immediately.
If your Business Instagram account isn't yet linked to your Facebook Page, follow the steps below. While a Business Instagram account isn't required to run Instagram ads (your Facebook profile will be used), we recommend creating one to build an Instagram following.
Steps to Link Your Instagram Account:
Go to Business Settings: Again, navigate to "Business Settings" from the Business Manager menu.
Navigate to Instagram Accounts: In the left-hand menu, under "Accounts," click on "Instagram Accounts."

Screenshot of Business Settings left menu with "Instagram Accounts" highlighted Click "Add": Click the blue "Add" button.

Screenshot of "Instagram Accounts" section with "Add" button Connect Your Instagram Account: In the pop-up window, click the blue "Connect Your Instagram Account" button.

Screenshot of "Connect Instagram Account" pop-up window Log in to Instagram: You'll be prompted to log in to your Instagram account. Enter your Instagram username and password.
Follow the Prompts: Instagram may ask you to confirm the connection. Follow any on-screen instructions to finalize linking your Instagram account to your Business Manager.
Why Link Your Pages?
Run Ads on Facebook and Instagram: Linking your Pages is essential for running ads on both platforms through your Business Manager.
Unified Management: Manage your Page and Instagram account alongside your ad accounts in one central location.
Cross-Platform Features: Unlock features that allow for seamless advertising and content sharing between Facebook and Instagram.
Troubleshooting Tip: If you have trouble linking your Instagram account, ensure your Instagram account is set to a "Business Account" or "Creator Account" in Instagram settings.
4. Creating Your Meta Ads Account: Your Gateway to Generating Leads
To run Meta Ads, you need an Ad Account within your Business Manager. Think of your Ad Account as your payment and management hub for all your advertising campaigns.
Steps to Create an Ad Account:
Go to Business Settings: In your Business Manager, click the menu icon (nine dots) and select "Business Settings."
Screenshot of "Business Settings" button click Navigate to Ad Accounts: In the left-hand menu, under "Accounts," click on "Ad Accounts."
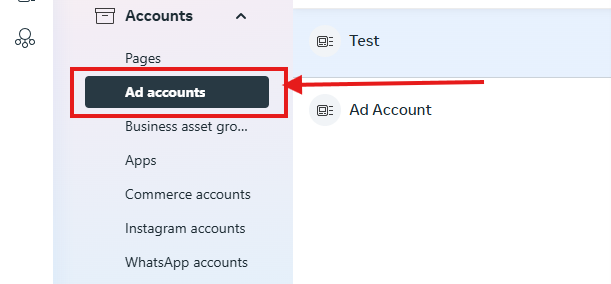
Screenshot of Business Settings left menu with "Ad Accounts" highlighted Click "Add": You'll see a blue "Add" button. Click it and choose "Create a new ad account" from the dropdown menu.

Screenshot of "Ad Accounts" section with "Add" button and dropdown menu showing "Create a new ad account" Create and Name Your Ad Account: Enter a descriptive name for your ad account. It's helpful to use a name that reflects your business or client. Make sure you select the correct country, currency, or time zone during ad account creation, as these are often not editable later.

Screenshot of "Name your ad account" pop-up window 
Screenshot of setting up your Meta ads account window Select Page (Optional): You may be prompted to select a Facebook Page to associate with your ad account. Choose the Page we linked earlier from the dropdown menu if prompted.
Add Payment Information: You will be prompted to add your payment method. Enter your credit card, PayPal, or other preferred payment details.
Assign People and Permissions (Optional but Recommended): You can assign yourself and/or team members to manage the ad account. Click "Add People," select your name or team members, and choose the appropriate permission level (e.g., "Admin Access" for full control).
Why is an Ad Account Important?
Run Ads: You cannot run Meta Ads without an active Ad Account. It's the fundamental requirement for advertising on the platform.
Manage Billing and Payment: Your Ad Account is where you manage your advertising budget, payment methods, and billing information.
Track Ad Performance: All your campaign data and performance metrics are associated with your Ad Account.
Control Access: You control who has access to manage your advertising through Ad Account permissions.
Troubleshooting Tip: If you encounter errors creating an ad account, ensure you have filled in all required fields correctly, especially payment information.
Common Mistake: Selecting the wrong country, currency, or time zone during ad account creation, as these are often not editable later. Double-check these settings!
4. Building Your First Meta Ads Campaign: A Step-by-Step Meta Ads Guide
Now that you have your Business Manager, Pixel, and Pages set up, you're ready to build your first campaign!
Steps to Create a Campaign:
Go to Ads Manager: In your Business Manager, click the menu icon and select "Ads Manager."

Screenshot of Business Manager menu with "Ads Manager" highlighted Click "Create": You'll find a green "Create" button to start a new campaign.
Choose Your Buying Type and Campaign Objective: It's important to always use 'Auction' for the Buying type as this gives you the most flexibility to make adjustments to the campaign while it's active. In terms of objectives, Meta offers various campaign objectives categorized into:

Screenshot of Campaign Objective selection screen in Ads Manager with Leads selected Awareness: Reach (show your ad to the maximum number of people) and Brand Awareness (increase awareness of your brand).
Traffic: Link Clicks (drive traffic to your website) and Landing Page Views (drive traffic to your website and optimize for landing page views).
Engagement: Engagement (get more Page likes, event responses, or post reactions, comments & shares), App Installs (get people to install your app), and Video Views (get people to watch your video).
Leads: Instant Forms (collect leads directly on Meta), Messenger (start conversations in Messenger), Conversions (drive valuable actions on your website or app), and Calls (get people to call your business).
App Promotion: App Promotion (find new people to install your app and engage with it).
Sales: Conversions (drive sales on your website, app, or in messaging), Catalog Sales (show ads with items from your product catalog), and Store Traffic (drive visits to your physical stores).
Select Campaign Objective. Since your goal is to drive leads, select this campaign objective as that suits your marketing goals.
Choose Campaign Setup. You will be prompted to do 'Recommended Settings' or 'Manual leads campaign'.

Meta ads campaign setup screen showing "Recommended settings" or "Manual leads campaign" Recommended settings: This is generally recommended for beginners as it simplifies the optimisation and allows you to leverage Meta's full suite of automatic optimisations. Select this option.
Manual leads campaign: Gives you more granular control but can be more complex to manage initially. This is not recommended for beginners.
Building your campaign. Meta campaigns are structured hierarchically: campaigns contain ad sets, which contain creatives. For optimal performance, consolidate to a single campaign and ad set whenever possible. This maximizes the budget available for Meta's algorithm to learn and optimize for lead form completions. Focus on creative testing, as this has the greatest impact on campaign performance.

Meta ads campaign setup window Since you clicked create, you will now be in the 'Campaign' setup screen. This is where you will:
Name your campaign: Use a naming convention like "Business Name - Lead Generation - Month - Year" for your campaigns.
Categorize your ads (if you fall into a specific category): You must declare if your ads are about financial products/services, employment, housing, social issues, elections, or politics. Country-specific requirements apply.
Advantage campaign budget: Campaign-level budgeting is recommended for easy budget management. Choose either a daily or lifetime budget. A daily budget offers the greatest flexibility to adjust spending as needed.

Screenshot of Advantage campaign budget settings in Meta ads manager
Go Next To Start Building Out Your Ad Set:

Screenshot of Ad Set level targeting options in Ads Manager Ad Set Name: Give your ad set a descriptive name (e.g., "Men 25-35 interested in cars").
Conversion: This is important as you can decide where you want to generate leads. The three most common are to generate leads through your websiteand instant forms. Consider starting out with Website optimised leads (since you have the Meta pixel setup now) as this will most likely give you higher quality of Instant Forms. Instant Form leads are lead forms on the Meta platform and are generally cheaper as they are easier to submit, but the quality tends to be lower. Consider what is right for you and your business.
Budget & Schedule: Your budget is already set at the campaign level, so no changes are needed here. Set your ad start date, and leave the end date blank for continuous ad delivery. Changing other budget and scheduling settings may negatively impact lead generation and Meta's optimization capabilities, so it's best to leave them as is.
Audience Controls: Avoid restricting targeting here, as we'll define our ideal audience later, which generally yields better results. Only restrict if legally required or if you operate within specific geographic areas.

Screenshot of Meta Ads manager "Audience controls" section Locations: Target by country, region, city, or even specific addresses.
Minimum Age: Select the minimum age required.
Exclude custom audiences: This could be those who have opted out of marketing from your customer list, or you need to exclude existing customers who you do not want to waste budget on.
Connections: Target people who like your Page, friends of people who like your Page, or exclude people who like your Page.
Languages: You can only serve to specific languages.
Advantage+ audience: This is where you will input your audience suggestion for Meta's AI to start in the right place.

Screenshot of Meta Ads manager "Advantage+ audience" section Custom Audiences: This allows you to target lookalike audiences—those similar to your existing customers or website visitors. This requires uploading a customer list or having a Meta Pixel with sufficient data. For Lead generation, it's generally not recommended to serve your ad again to people who you already have contact details for, as you can reach them already so don't target an existing customer list in here.
Age & Gender: Select age ranges and genders relevant to your target customer.
Detailed Targeting: Target people based on their interests, demographics, and behaviors. Start broad and refine as you learn. Examples: "Cars", "Furniture," "Luxury Goods".
Connections: Target people who like your Page, friends of people who like your Page, or exclude people who like your Page.
Placements: Choose where your ads will appear.

Screenshot of Meta Ads manager "Placements" section Automatic Placements (Recommended): Meta will automatically place your ads across platforms (Facebook, Instagram, Audience Network, Messenger) where they are likely to perform best. This should already be enabled and will drive you the best lead performance.
Manual Placements: Choose specific placements like Facebook Feed, Instagram Feed, Instagram Stories, etc. This gives you more control but requires more platform knowledge.
Ad Level - Create Your Ad Creatives:

Screenshot of Ad Creative setup in Ads Manager Ad Name: Give your ad a descriptive name.
Identity: Select your Facebook Page and Instagram account (if applicable).
Ad Creative: This is what people will actually see! Choose your ad format:
Single Image or Video: A single visual with text.
Carousel: Showcase multiple images or videos in a swipeable format. Great for product catalogs or showcasing different features.
Collection: Visually appealing format that combines a cover image or video with product images below. Does not perform that well for Lead generation so this is not recommended.
Ad Creative Content:
Images/Videos: Use high-quality, visually appealing visuals that are relevant to your offer and target audience. Build at least three ads to start with before launching the campaign.
Headline: Grab attention quickly. Keep it concise and benefit-driven. Use the five headlines available to allow Meta's AI to optimise to the best performing.
Primary Text: Explain your offer and value proposition in more detail. Use the five primary text options available to allow Meta's AI to optimise to the best performing.
Description (Optional): Additional text that appears below the headline.
Call-to-Action Button: Encourage clicks with clear CTAs like "Contact Us" "Apply Now" "Sign Up". Don't use the generic "Learn more" as this can hinder your ad effectiveness.
Website URL: Where you want to send people when they click your ad. Ensure it's relevant to your ad and landing page experience is optimized.
Review and Publish: Double-check all your campaign, ad set, and ad settings. Once you're satisfied, click "Publish" to launch your campaign!
Troubleshooting Tip: If your ads aren't running after publishing, check that your payment information is correctly entered in your Ad Account settings and that your ad scheduling is set to "Run continuously" or your desired dates.
Common Mistake: Making your target audience too narrow when starting out. It's often better to start with a slightly broader audience and refine based on performance data.
5. Campaign Optimization: Improving Your Results Over Time
Launching your campaign is just the first step. To get the best results, you need to continuously monitor and optimize your ads.
Key Optimization Strategies:
Monitor Your Campaign Performance: Regularly check your Ads Manager dashboard to track key metrics like:

Screenshot of Ads Manager dashboard showing key metrics Impressions: How many times your ad was shown.
Reach: The number of unique people who saw your ad.
Clicks (Link Clicks): How many people clicked on your ad link.
Click-Through Rate (CTR): Percentage of impressions that resulted in clicks (Clicks / Impressions). A higher CTR generally indicates more engaging ads.
Cost Per Click (CPC): Average cost you pay for each click.
Conversions: Tracked actions from your Meta Pixel (purchases, leads, etc.).
Cost Per Results or Conversions (CPA): Average cost you pay for each conversion or lead.
Analyze these metrics to understand what's working and what's not, especially on each creative.
Improve Ad Creatives: Analyze which ad creatives are getting high CTRs and leads. Double down on what's working and iterate on underperforming ads to improve engagement.
Landing Page Optimization: Ensure your landing page is relevant to your ad, loads quickly, and makes it easy for people to take the desired action (e.g., leads, key button clicks or sign ups). A poor landing page can hurt your ad performance.
Budget Adjustments: If a campaign or ad set is performing well, consider increasing the budget to scale your results. If something is underperforming, pause it and re-evaluate your strategy.
Keep Learning: Meta Ads is constantly evolving. Stay updated on best practices and new features through Meta's resources and industry blogs to stay ahead of the curve.
Wrap Up
Creating a successful Meta Ads campaign takes practice and continuous learning. By following these steps and consistently optimizing your campaigns, you can effectively reach your target audience, drive results for your business, and grow your online presence using the power of Meta Ads. Start small, test, learn, and refine your approach over time to maximize your advertising ROI.
Now you're ready to start creating your first Meta Ads campaign! Begin with a small budget, track your results, and don't be afraid to experiment. Visit the Meta Ads Help Center (Meta Ads Help Center) for more in-depth resources and support.
Once you've got your first Facebook ads campaign up and running, check out these top 5 tips to boost your lead quality if you're aiming to optimize lead generation.
Comments